Building your perfect road bike – Part One
with Feedback Sports & Fulford Cycles

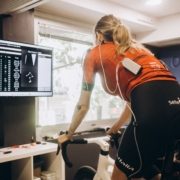
Bike Build with Feedback Sports
It’s so easy these days to simply walk into a bike shop and walk out with a new bike. However, once we start riding it, we often then change certain parts: wheels, the seat post, the saddle, the gearing, all parts that are often changed by cyclists. We wanted to show you how easy it can be to put together your own dream machine, with help from the experts at the local bike shop.
Working with industry friends from Feedback Sports, we set up a home workshop and contacted Rich from York based Fulford Cycles. With help from our friends at Vitamina C PR in Italy, we put together a plan with 3T in Italy, Vittoria UK and we got the necessary parts to support the frame we’d chosen. Bianchi was to be our frame of choice, taking their Infinito frame for all day riding and choosing the latest Shimano Ultegra Disc groupset, with a 34 rear cassette for the steep northern hills. We avoided Di2 as we want this to be our main review and touring bike and mechanical groupsets can be fixed anywhere in the world.

Choosing Components
3T produce some of the best bikes and finishing kit in the cycling world and we wanted to show how well their bars, stem and seat posts would look on your own frame builds, using the Super Ergo Team Comfort carbon bars with internal routing, the Team Stem and the Zero 25 seatpost. These will keep the weight down perform superbly for our needs and look amazing.
The wheels are Vittoria Elusion disc, which are tubeless ready and will roll well and again be reasonably well suited to riding in the hills on all standards of roads. Time to get building then.
Getting the basics fitted
Once we’d fitted the seatpost, making sure that we didn’t over tighten things, we put the frame onto the stand and got to work. First on was the bottom bracket and we went for a standard Shimano press fit. Whilst we recognise some riders often complain about bb noise from press fit, this is usually related to poor fitting. Making sure that you get the tolerances right and that you use the right grease and adhesives key to avoiding the clicks and creaks. We recommend that you trust the experts at the bike shop with the bb fitting, as it’ll also save you the cost of the necessary tools.
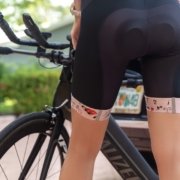
With the bottom bracket fitted, we’re ready to start making things looking like a road bike.